How To - PoS Functions
POS Usage & Behaviour
While these functions are performed at POS, the traffic is routed via the Zonal CLM Service and agent on the Back of House PC and through the PC’s internet connection.
You can close accounts with loyalty identifiers assigned, but if no internet connectivity is present then prize redemptions, cancellations and balance checks will be unavailable.
Theme Modelling
There are four main loyalty functions, all of the buttons for which can be found in the button picker under Other lists --> iZone
| Assign loyalty card |

|
| Balance Check |

|
| Redeem Prize |

|
| Cancel Prize |

|
You can rename the loyalty function buttons to fit in with the branding of your program if you wish (there is a Register iZone account button), however this is not recommended 
Assigning a Loyalty Account
There are several ways a loyalty customer can be identified at the POS. A card can be swiped at any time to identify a loyalty customer, or a barcode can be scanned.
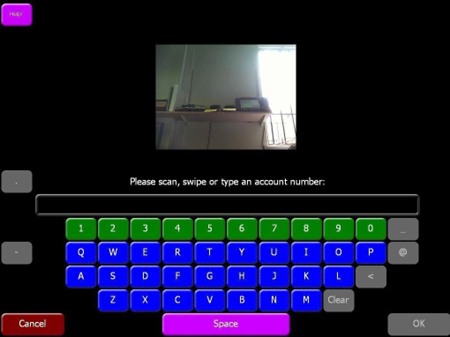
If the Assign Loyalty function is used, this also allows the user to type the number in manually or on an i700 device, scan a QR code from either of the cameras:
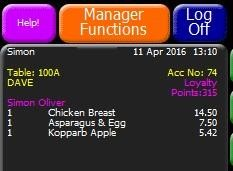
Once identified, the Order display will show the user that a loyalty account is tied to the account:
Unassigning a Loyalty Account
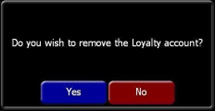
The Assign / De-Assign Account button acts as a toggle so if the wrong card was swiped against the account, the user can press the button to remove the loyalty card assignment.
Toggling the button will show this message:
The only caveat to removing the assignment from an account is if prize redemption has taken place on the account. If this has occurred, then the loyalty account is locked into the account till the account is closed and finalised.
Even if a prize is redeemed and then cancelled, the loyalty identifier remains locked to the account and cannot be removed.
Loyalty Balance Check
If you want to check the customers loyalty balance, press the Loyalty Balance Check function. 
If a loyalty card in not assigned, then the Assign Account screen will show.
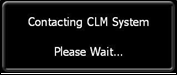
This will then contact iZone to retrieve the data:
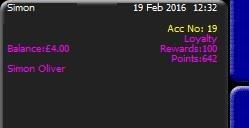
When the data is retrieved, the POS user will be presented with a screen like this:
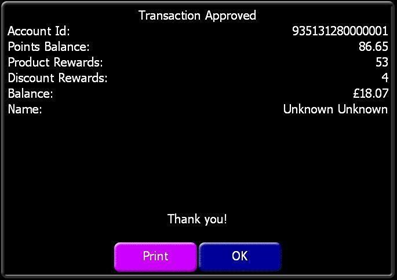
Account ID – The loyalty card number
Points Balance – Loyalty card current points balance
Product Rewards – The number of product rewards available to customer
Balance – The balance of a currency reward available to customer.
Name – The customer’s name.
Print - will print off a hard copy of the information shown in the dialogue along with site and account header information. Total number of rewards is shown along with both a points and currency balance.
Redeeming a Loyalty Prize
Customers must have registered their details against the loyalty card before redemptions are allowed at all. Customers will accrue points while the card is unregistered but cannot redeem any.
On the balance check function, if a card isn’t registered there is text to indicate this to the POS user to advise the customer accordingly.
Full registration is available on the website. Lite Registration is also available via the POS and is detailed in the next section.
If a customer wishes to redeem a prize, then the iZone Product Redeem function can be used. 
If a loyalty card in not assigned, then the Assign Account screen will show.
The rewards available will then be shown.
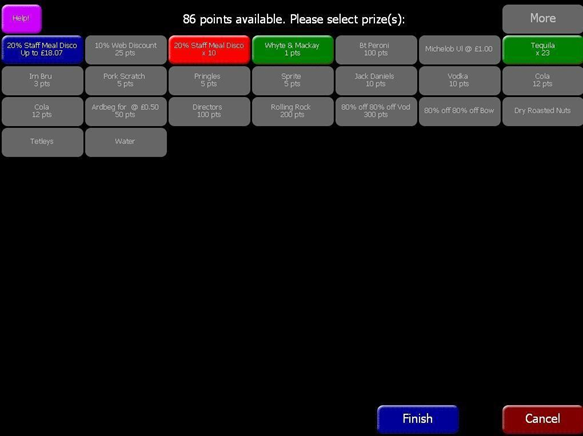
Note that if you have no prizes available or none that can be redeemed because qualifying criteria has not been met then a dialogue stating No prizes available will be shown.
Products will appear in green, normal discounts in red and currency discount in blue.
These will also be grouped together to enable easier identification and selection by the user.
There is also a “more” button available if the number of prizes available exceeds the available screen space. If the user attempts to redeem a product which has >1 available, the redemption GUI will update the button to show how many of each product has been redeemed:

If a discount is pressed, the redemption dialogue will automatically exit, then contact iZone and ring up all the products which were selected.
If the user doesn’t wish to use a discount, pressing the Finish button on the redemption dialogue will complete the operation.
Cancelling Loyalty Prize
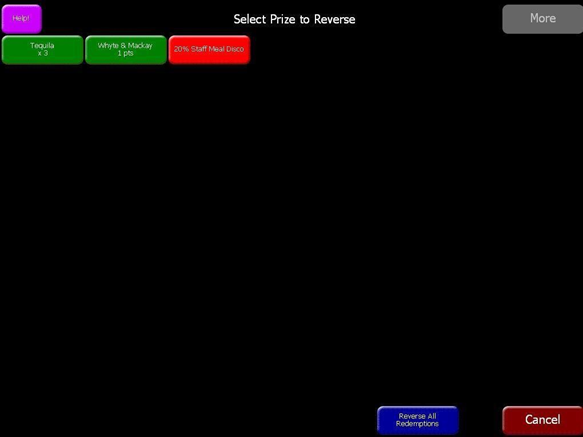
If the user has made a mistake, they can correct off prize redemptions via the iZone Cancel Products function:

This dialogue will allow the user to correct redemptions individually, in multiples or cancel all the redemptions against the account. Once the user selects the prizes to reverse, the system will contact iZone to update the customer’s account with the new prize levels.
Note that if the discount is selected in this dialogue, then the user still has to press the Reverse All Redemptions button to complete the operation.
Lite Registration of a Loyalty Account
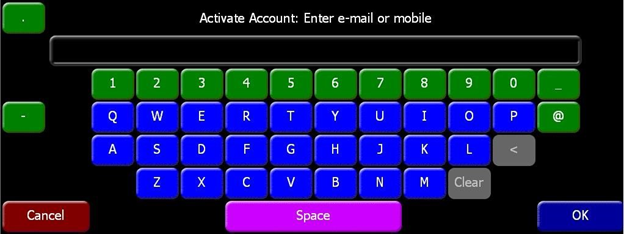
If the Customer wishes to register their account at the POS then the Register iZone Account feature can be used. The purpose of this feature is to provide enough details at POS to allow rewards to be redeemed. The user can then type in a mobile number or email address which will then send details to iZone and either be approved or declined based on the validity of entered information.
Press the Register iZone Account function when an unregistered card has been swiped against the account:
Assigning Loyalty Account to a split account
If the Customer wishes to use multiple loyalty cards on one account this can be achieved by splitting the account and assigning each card to each split account.
Start by selecting the method of splitting the bill.

-
Split Account – Allows individual items to be split out.
-
Split Total By… - Allows the total amount to be divided by a number of accounts.
After splitting the account, the table will then be show with a line down the centre of the button. 
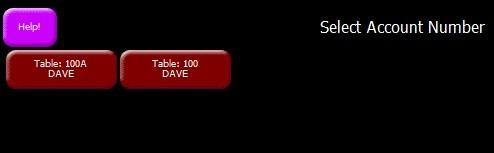
Pick up the table and then you will be prompted to select which split account you wish to select.
A loyalty card can then be assigned to the split account as normal.
The card number will remain on the split account until it is removed or the split account is paid. If a split account is saved, then the card number will be saved as normal.